
The Raspberry Pi is one of the most versatile and affordable pieces of electronics on the market nowadays. One great feature you can take advantage of with the Raspbian Jessie operating system that runs on it is to install Kodi, an open-source home media center software program used for playing an array of digital content.
To install Kodi on Raspbian Jessie, you need to have a basic understanding of the command line.
To make sure everything is working properly, you should check out some of its features like changing the display size and resolution, adding media sources, and customizing the appearance. You can even install add-ons from the official Kodi repository or from third-party sources to add more content and customization options.
This post will guide you through everything from preparing your Raspberry Pi 3B+ board to properly installing Kodi so that you can start streaming all kinds of digital content like movies, music, and photos in no time!
About Kodi
One of the key benefits of Kodi is its flexibility. The application can be used to play a wide range of media formats, including music, videos, podcasts, and more. Additionally, Kodi supports a wide range of add-ons, which can be used to extend its functionality even further. These add-ons range from simple interface tweaks to complex media libraries and streaming services [1].

Another important aspect of Kodi is its customization. The software has a robust user interface that can be customized to suit the user’s needs. For example, users can create custom menus and widgets to make accessing their media easier. Additionally, Kodi supports a range of themes, which can be used to change the look and feel of the application.
One of the most popular uses of Kodi is as a media center for the living room. By connecting a computer or other device running Kodi to a TV, users can create a home theater experience that rivals commercial offerings. This is particularly useful for users who want to watch content that is not available through traditional channels, such as live TV or streaming services.
Kodi is also popular among enthusiasts who use it as a way to access content from around the world. Because the software supports a range of add-ons, users can access content from sources that are not available in their region. This can include live sports, international TV channels, and more.
About Raspbian Jessie
One of the key benefits of Raspbian Jessie is its ease of use. The operating system is designed to be user-friendly, even for those who are new to Linux. Additionally, the software includes a range of tools and applications that make it easy to get started with the Raspberry Pi. For example, Raspbian Jessie includes a range of programming tools, such as Scratch and Python, that are popular among educators and hobbyists.
Another important aspect of Raspbian Jessie is its compatibility. The operating system is designed specifically for the Raspberry Pi, which means that it takes advantage of the hardware’s capabilities. This includes support for the Pi’s GPIO pins, which can be used to connect sensors, motors, and other devices. Additionally, Raspbian Jessie includes drivers and support for a wide range of peripherals, such as USB devices and cameras.
Raspbian Jessie also includes a range of features that make it ideal for use as a media center. For example, the operating system includes the Kodi media player application, which can be used to play a wide range of media formats. Additionally, Raspbian Jessie includes support for hardware-accelerated video playback, which can improve the performance of the media player.
Finally, Raspbian Jessie is popular among makers and hobbyists because it is open-source. This means that the operating system can be customized and modified to suit the user’s needs. Additionally, the software is supported by a large community of developers and users, which means that help and support are readily available.
How to Install Kodi on Raspbian:
Make Sure You’re Using Raspbian Stretch
Before you start, it’s important to make sure that you’re using Raspbian Stretch. Raspbian is a free operating system based on Debian that is optimized for the Raspberry Pi. It’s important to use the latest version of Raspbian as it includes important updates and bug fixes. To check if you’re using Raspbian Stretch, open a terminal and type:
cat /etc/os-release
This will display information about your operating system, including the version of Raspbian that you’re using. If you’re not using Raspbian Stretch, you’ll need to upgrade your operating system before continuing.
Configuring Your Raspberry Pi for Kodi
Before you install Kodi, you’ll need to configure your Raspberry Pi to optimize it for running Kodi. Here are the steps you need to follow:
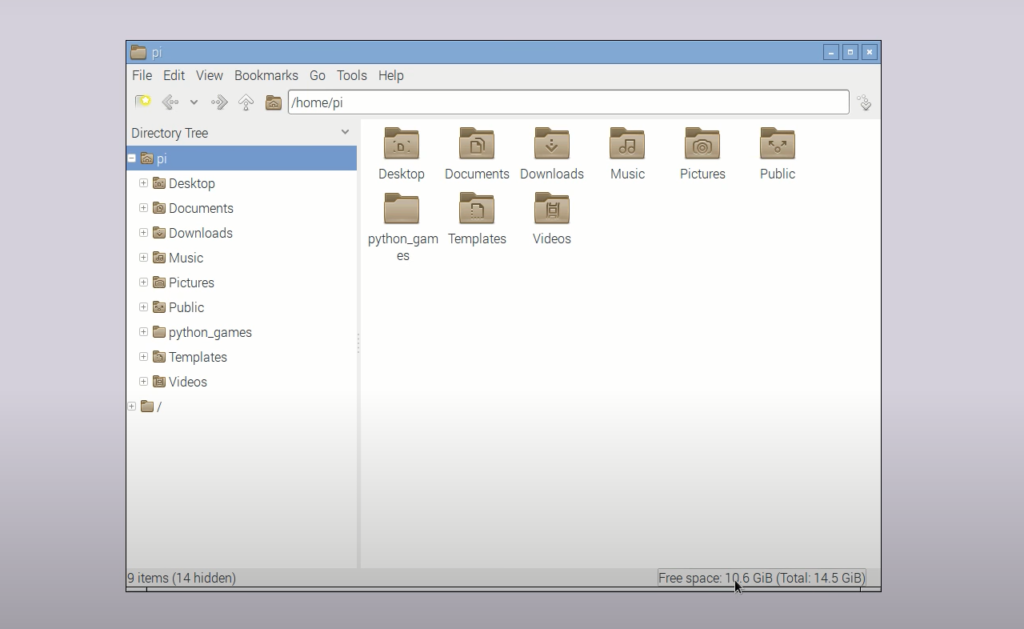
Expanding the Filesystem
The first thing you’ll need to do is expand the filesystem on your Raspberry Pi. This will ensure that you have enough space to install Kodi and store your media files. To do this, open the Raspberry Pi Configuration tool by typing:
sudo raspi-config
Select “Advanced Options” and then “Expand Filesystem”. Follow the prompts to expand the filesystem.
Altering Memory Split
The next step is to alter the memory split on your Raspberry Pi. By default, Raspbian reserves a certain amount of memory for the GPU, which can impact the performance of Kodi. To optimize Kodi’s performance, you’ll need to reduce the amount of memory allocated to the GPU. To do this, open the Raspberry Pi Configuration tool again and select “Advanced Options” and then “Memory Split”. Set the memory split to 128MB and then exit the tool.
Enabling Video Codecs
Kodi requires a number of video codecs to play different video formats. To enable these codecs on your Raspberry Pi, you’ll need to enter the following commands in a terminal:
sudo apt-get update
sudo apt-get install -y libmpeg2-4-dev libpostproc-dev libavformat-dev libavfilter-dev libswscale-dev libavcodec-dev
Setting the Right Desktop Driver
The desktop driver on your Raspberry Pi can also impact the performance of Kodi. To ensure that Kodi runs smoothly, you’ll need to use the “fake KMS” desktop driver. To do this, open the terminal and type:
sudo nano /boot/config.txt
Add the following line to the end of the file:
dtoverlay=vc4-fkms-v3d
Save the file and exit.
Installing Kodi on Raspbian Stretch
Now that you’ve optimized your Raspberry Pi for Kodi, you’re ready to install Kodi. To do this, enter the following commands in a terminal:
sudo apt-get update
sudo apt-get install -y kodi
This will download and install Kodi on your Raspberry Pi.
Tweaking the Kodi Install
Once Kodi is installed, you’ll need to make a few tweaks to ensure that it runs smoothly. First, you’ll need to configure the resolution and aspect ratio of your display. To do this, open the Kodi settings by clicking on the gear icon on the home screen.
Navigate to “System” and then “Display”. Here you can set the resolution and aspect ratio to match your display [2].
Next, you may want to configure the audio settings in Kodi. To do this, navigate to “System” and then “Audio”. Here you can configure the audio output settings, including the device and output format.
Finally, you may want to install some add-ons to enhance the functionality of Kodi. To do this, navigate to “Add-ons” and then “Install from repository”. Here you can browse and install a variety of add-ons, including video and music add-ons, skins, and more.
It Doesn’t Have to Be Raspbian
While Raspbian is the recommended operating system for running Kodi on a Raspberry Pi, it’s not the only option. There are a variety of other operating systems that can be used, including OSMC, LibreELEC, and OpenELEC. These operating systems are optimized for running Kodi and can be a great option if you’re looking for a more streamlined experience.
To install Kodi on one of these operating systems, you’ll need to follow the specific installation instructions for that operating system. However, many of the steps we’ve covered in this article, including configuring the memory split and installing codecs, will still apply.
Compiling Kodi on Raspberry Pi OS Bullseye:
Compiling Kodi on Raspberry Pi OS Bullseye involves several steps, including preparing to compile Kodi, compiling and installing Kodi, installing additional Kodi add-ons, and configuring hardware acceleration on a Raspberry Pi 4.
1) Preparing to Compile Kodi
Before we start compiling Kodi on Raspberry Pi OS Bullseye, we need to ensure that our system meets the minimum requirements. To compile Kodi, we need to have the following packages installed:
- build-essential
- git-core
- cmake
- pkg-config
- libfontconfig1-dev
- libfreetype6-dev
- libx11-dev
- libxrandr-dev
- libxrender-dev
- libmad0-dev
- libogg-dev
- libvorbis-dev
- libsqlite3-dev
To install these packages, open the terminal and run the following command [3]:
sudo apt-get install build-essential git-core cmake pkg-config libfontconfig1-dev libfreetype6-dev libx11-dev libxrandr-dev libxrender-dev libmad0-dev libogg-dev libvorbis-dev libsqlite3-dev
Once you have installed these packages, you can proceed to the next step.
2) Compiling and Installing Kodi
To compile and install Kodi on Raspberry Pi OS Bullseye, follow these steps:
- Clone the Kodi repository: git clone https://github.com/xbmc/xbmc.git
- Switch to the Kodi directory: cd xbmc
- Configure Kodi for Raspberry Pi: ./configure –prefix=/usr –disable-gles –disable-gles2 –disable-vaapi –disable-vdpau
- Compile Kodi: make -j4
- Install Kodi: sudo make install
3) Installing Additional Kodi Addons
Kodi offers a wide range of add-ons that can enhance your streaming experience. To install additional Kodi add-ons, follow these steps:
- Open Kodi and navigate to the “Add-ons” section;
- Click on “Install from repository” and select the add-on repository you want to install from;
- Select the add-on you want to install and click on “Install”;
- Wait for the installation to complete;
4) Configuring Hardware Acceleration on a Raspberry Pi 4:
Raspberry Pi 4 has hardware acceleration support that can improve Kodi’s performance. To configure hardware acceleration on a Raspberry Pi 4, follow these steps:
a) Open the terminal and run the following command to install the necessary packages:
sudo apt-get install libdrm-dev libva-dev libvdpau-dev libmpeg2-4-dev libmmal-dev libraspberrypi-dev
b) Edit the Kodi configuration file:
sudo nano /usr/share/kodi/system/advancedsettings.xml
c) Add the following lines to the file:

d) Save the file and exit
e) Reboot the Raspberry Pi
Once you have configured hardware acceleration, you can enjoy better performance while using Kodi on your Raspberry Pi [4].
Running Kodi On your Raspberry Pi
After compiling and installing Kodi on your Raspberry Pi, you can launch it using the Raspberry Pi OS desktop interface or the terminal.
1) Opening Kodi On the Raspberry Pi OS Desktop Interface:
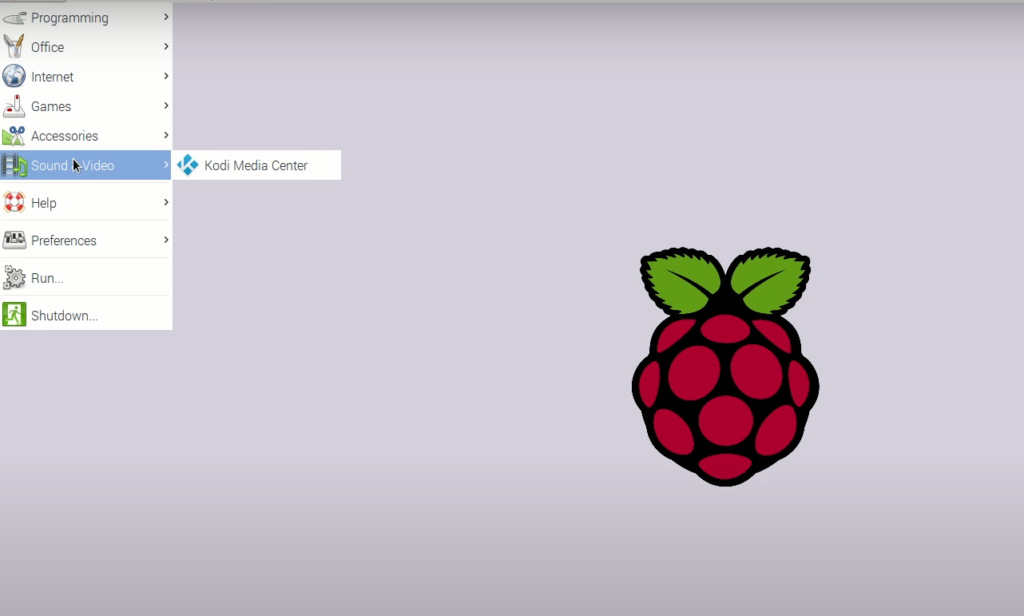
To open Kodi on the Raspberry Pi OS desktop interface, follow these steps:
- Click on the Raspberry Pi icon in the top-left corner of the screen;
- Select “Sound & Video” from the menu;
- Click on “Kodi Media Center” to launch Kodi;
2) Launching Kodi Using the Terminal:
To launch Kodi using the terminal, follow these steps:
- Open the terminal;
- Type the following command to launch Kodi: kodi;
3) Getting Kodi to Auto-Start on the Raspberry Pi:
To get Kodi to auto-start on the Raspberry Pi, follow these steps:
- Open the terminal
- Type the following command to edit the autostart file: sudo nano /etc/xdg/lxsession/LXDE-pi/autostart
- Add the following line to the file: @kodi
- Save the file and exit
- Reboot the Raspberry Pi
How to Install Kodi on Raspberry Pi using Raspberry Pi Imager?
If you don’t want to compile Kodi on your Raspberry Pi, you can use the Raspberry Pi Imager to install Kodi on your Raspberry Pi. Here’s how [5]:
- Download and install the Raspberry Pi Imager on your computer;
- Insert the SD card into your computer;
- Open the Raspberry Pi Imager and select the operating system you want to install (Raspberry Pi OS);
- Choose the SD card you want to use;
- Click on “Choose OS” and select “Misc utility images”;
- Select “KodWrite”;
- Once the process is complete, insert the SD card into your Raspberry Pi and turn it on;
How to Use Kodi on a Raspberry Pi:
Using Kodi on a Raspberry Pi is easy. Here are some tips to help you get started:
- To add media to Kodi, click on “Videos” or “Music” and select “Files”;
- Click on “Add Videos” or “Add Music” and select the location of your media files;
- You can use Kodi addons to enhance your media experience. To install add-ons, click on “Add-ons” and select “Install from repository”;
- You can also customize Kodi by changing the settings. To access the settings, click on the gear icon in the top-left corner of the screen;

If you have multiple Raspberry Pi devices running Kodi, you can synchronize them using the “Kodi Sync” addon.
You can control Kodi using a remote control or a smartphone app:
- To use a remote control, connect it to your Raspberry Pi and configure it in the Kodi settings;
- To use a smartphone app, download the “Kore” app from the Google Play Store or the App Store;
If you encounter any issues while using Kodi on your Raspberry Pi, you can refer to the Kodi documentation or the Raspberry Pi forums for help.
FAQ:
- How to set up Kodi on Raspberry Pi 4?
To set up Kodi on Raspberry Pi 4, follow these steps:
- Download the latest version of Raspberry Pi OS from the official Raspberry Pi website;
- Download the latest version of Kodi from the official Kodi website;
- Connect your Raspberry Pi to the internet;
- Open a terminal window on your Raspberry Pi and type in the following command to update your system: sudo apt-get update && sudo apt-get upgrade -y;
- Install Kodi on your Raspberry Pi by typing in the following command: sudo apt-get install kodi;
- Launch Kodi by typing in the following command: kodi;
- How to install Kodi 18 on Raspberry Pi?
To install Kodi 18 on Raspberry Pi, follow these steps [6]:
- Download the latest version of Raspberry Pi OS from the official Raspberry Pi website;
- Download the latest version of Kodi 18 from the official Kodi website;
- Connect your Raspberry Pi to the internet;
- Open a terminal window on your Raspberry Pi and type in the following command to update your system: sudo apt-get update && sudo apt-get upgrade -y;
- Install Kodi 18 on your Raspberry Pi by typing in the following command: sudo apt-get install kodi=18.9+dfsg1-2;
- Launch Kodi by typing in the following command: kodi;
- Does Kodi still work on Raspberry Pi?
Yes, Kodi still works on Raspberry Pi. In fact, Kodi is one of the most popular media center applications for Raspberry Pi.
- Which Raspberry Pi is best for Kodi?
Any Raspberry Pi model can run Kodi, but the Raspberry Pi 4 is the best option for Kodi as it has more processing power and memory compared to other models.
- How do I manually install Kodi?
To manually install Kodi, follow these steps:
- Download the latest version of Kodi from the official Kodi website;
- Transfer the Kodi file to your Raspberry Pi using a USB drive or by connecting to your Raspberry Pi via SSH;
- Open a terminal window on your Raspberry Pi and navigate to the folder where the Kodi file is located;
- Install Kodi by typing in the following command: sudo dpkg -i kodi-*.deb;
- What version is Raspbian Jessie?
Raspbian Jessie is an old version of Raspberry Pi OS. The latest version of Raspberry Pi OS as of 2023 is Raspberry Pi OS Bullseye.
- How to install Kodi builds in 2023?
To install Kodi builds in 2023, follow these steps [7]:
- Launch Kodi on your Raspberry Pi;
- Click on the gear icon to access the Settings menu;
- Click on “System” and then click on “Add-ons”;
- Click on “Install from Repository” and then select the “Kodi Add-on Repository”;
- Click on “Program Add-ons” and then select “Kodi Builds”;
- Choose the Kodi build that you want to install and click on “Install”;
- Wait for the installation to complete and then restart Kodi;
- How do I run a program in Raspbian?
To run a program in Raspbian, follow these steps:
- Open the terminal;
- Navigate to the folder where the program is located;
- Type in the name of the program and press Enter;
- Is a Raspberry Pi fast enough as a router?
Yes, a Raspberry Pi can be fast enough as a router, but it depends on the specific tasks and network demands. The Raspberry Pi’s processing power and network connectivity options can be sufficient for basic routing tasks, such as connecting multiple devices to the internet or setting up a small home network.
However, for more complex tasks or larger networks, a dedicated router with more powerful hardware and features may be a better option.
- Can Raspberry Pi run GPU?
Yes, Raspberry Pi can run GPU (Graphics Processing Unit). Raspberry Pi has a built-in GPU which is used to handle graphical tasks such as video playback and image processing. The GPU on Raspberry Pi can be utilized by various programming languages, such as Python and C++, to create graphical applications and projects [8].
- How do I turn my Raspberry Pi into a media center?
To turn your Raspberry Pi into a media center, follow these steps:
- Download and install Kodi on your Raspberry Pi;
- Connect your Raspberry Pi to your TV or monitor using an HDMI cable;
- Connect speakers or headphones to your Raspberry Pi if needed;
- Add your media files to your Raspberry Pi’s storage, either by transferring files from another device or by accessing them on a network drive;
- Launch Kodi on your Raspberry Pi and configure it to access your media files;

- How do I watch TV on my Raspberry Pi?
To watch TV on your Raspberry Pi, you can use Kodi and install TV add-ons that allow you to access live TV channels and streams. Follow these steps:
- Download and install Kodi on your Raspberry Pi;
- Launch Kodi and go to the Add-ons section;
- Select the option to install add-ons and search for TV add-ons;
- Install a TV add-on that provides access to live TV channels or streams;
- Configure the add-on to access the channels or streams you want to watch;
Useful Video: How To Install Kodi In Raspbian Jessie
References:
- https://www.makeuseof.com/tag/install-kodi-raspbian-media-center/
- https://kodi.wiki/view/HOW-TO:Install_Kodi_on_Raspberry_Pi
- https://pimylifeup.com/raspberry-pi-kodi/
- https://mycomputerhelp.net/2015/11/29/installing-kodi-media-center-in-raspbian-jessie-linux-for-raspberry-pi/
- https://circuitdigest.com/microcontroller-projects/install-kodi-on-raspberry-pi
- https://www.androidcentral.com/install-kodi-raspberry-pi
- https://all3dp.com/2/raspberry-pi-kodi/
- https://linuxhint.com/install-kodi-raspberry-pi/