However, its true potential is realized when you use it with plugins (called add-ons) to stream content over the internet. There are dozens of free Kodi add-ons available that can fetch any type of media you want to watch. You can think of add-ons as the bridge between Kodi and the vast world of free online content.
Add-ons are mentioned, and the topic of builds follows. A Kodi build is similar to a plugin in that it is a plugin but not the same. Add-on management appears to be the main purpose of every build. Because pre-installed add-ons are included with builds, you won’t have to install them separately.
Builds completely redesign Kodi from a visual standpoint as well as functionally. Install a build, and you’ll get preconfigured add-ons as well as a whole new way to interact with Kodi. Some Kodi builds are more popular than others among Kodi users [1].
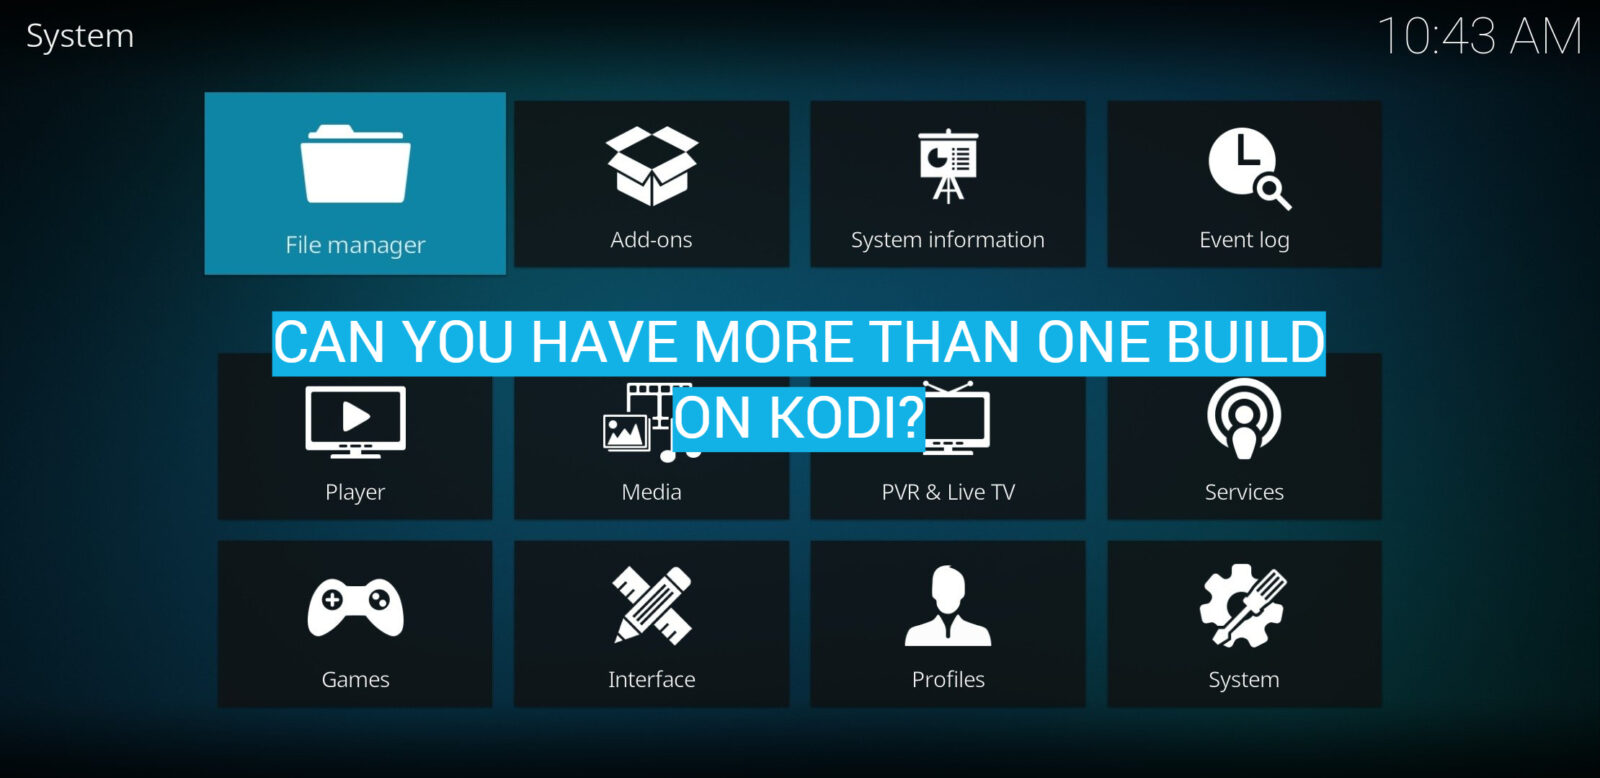
If you’re a Kodi user, you may be wondering if you can install more than one build on your device. The answer is yes – you can have multiple builds installed on Kodi at the same time! In this blog post, we’ll show you how to do it. Keep in mind that each build will use up some of your device’s storage space, so make sure you have enough room before proceeding.
Understanding Kodi Builds
Installing Kodi Builds
It’s easy to become overwhelmed by the number of strategies for installing Kodi builds. Some are as simple as downloading a specific .zip file, while others require more complicated steps. The majority of the greatest builds are installed in the same way, but one that works on any Kodi device regardless of platform.
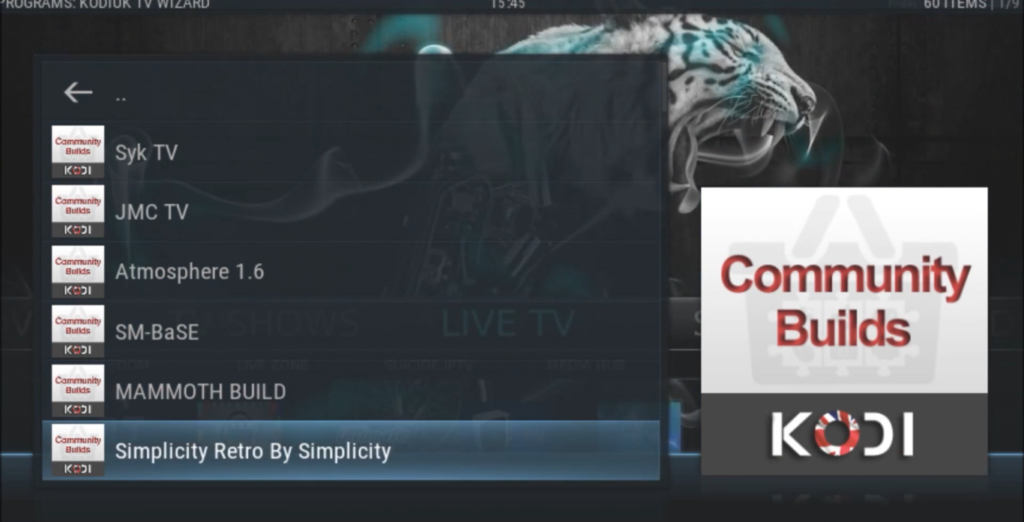
Kodi builds are generally created by various community groups. These programmers frequently have a dedicated repository for their work and a Kodi wizard add-on. To acquire access to the build, you’ll first need to install the repository, then the wizard extension, and finally the build itself. This may appear to be a time-consuming procedure, but it takes less than a minute to get started [2].
One of the biggest issues with installing Kodi is the size of the downloads. Add-ons usually weigh a few MBs each, but builds can be 100 MB, 200 MB, or 500 MB in total. This is because they come with add-ons and artwork packaged together. The servers hosting these files are often slow, which means you could end up waiting for upwards of half an hour for the download to finish – without being able to do anything else with Kodi during that time.
Starting Installation
You won’t be able to install a build or its linked wizard until you give Kodi clearance to access external files. But don’t worry, this is a quick toggle in your settings that won’t damage your media center at all.
Follow the steps below and you’ll be done in no time:
- To enter the “System menu” in Kodi, open the program and click on the gear icon;
- To add an addon, go to System Settings and select the “Add-ons” tab;
- Move the slider next to the “Unknown sources” option to the right;
- You should accept the warning message that pops up;

Types of Build Installs
The options you’ll see while installing each build may look daunting, but don’t worry – most people can fly through the screens in seconds. Below is a quick rundown of what you’ll encounter:
- Jarvis, Krypton, Leia. If you installed the wrong build for your Kodi version, you might come across some aggravating errors;
- Lite vs Regular. Some builds come with an optional “lite” version which is usually intended for TV box and Fire Stick installs. However, you can still use it on your standard device if a fast interface is more important to you than shiny looks;
- Servers. Multiple servers can host your project. Choose someone you like, and if the download is taking too long, cancel it and try a new server;
- Standard vs Fresh Installs. Before you start the download, you will be asked if you want a standard install or a fresh install. If you choose the latter, it means that Kodi will erase everything so that you can use the build as-is. On the other hand, if you select standard installation, your data will remain intact. When installing multiple builds, always go for standard installation to preserve your data;
Once a Kodi build installs, you’ll often need to restart Kodi or reload the profile. Usually, the best solution is to simply close and restart the program, as some builds make many changes that won’t take effect until Kodi loads fresh. If a build doesn’t prompt you to do this automatically, you can always shut it down manually and start Kodi again afterward.
Switching Kodi Themes
Kodi’s look and feel will change once you’ve installed a build, and new add-ons will become available. These add-ons aren’t restricted to the build though – they work with all Kodi themes. This means that you could install a build, get its assortment of add-ons, then switch themes if you want to change things up–and none of this would impact the effectiveness of the build.
You can easily switch themes on Kodi by following a few simple steps. If you want to go back to the original look and feel of Kodi, simply select the Estuary skin option.
Of course, if you want to uninstall the build and all of its add-ons, that’s easy too. You can do this directly from Kodi’s interface without having to delete anything manually. Simply go to the “Add-ons” tab in your settings, select the build you want to remove, and click “Uninstall”. That’s it! Your Kodi will go back to normal as if you never installed anything.
Are Multiple Kodi Builds Possible?
Yes, multiple builds may be installed and used. However, the traditional method won’t suffice. You may only have one build on a single Kodi instance. You’ll need to install Kodi’s fork on your FireStick. A fork is a clone or replica of Kodi, in other words.
Popular builds, such as Titanium, are preinstalled in some Kodi forks while others come preloaded with plugins.
If you want to install more than one build of Kodi, you first need to have multiple instances of Kodi installed on your FireStick device. However, by default Fire Stick doesn’t allow for this. This is where a fork comes in handy as it tricks your device into thinking it’s a completely different application even though it’s essentially the same thing [3].

How I Install More Than One Build On Kodi
Method 1. Using the Downloader App
The downloader method not only allows you to install Kodi builds on your Firestick but any other device as well. Further, you can use this method even if you do not have any other build installed on Kodi.
To get started, you first need to install the Downloader app on your device [3].
Once the Downloader app is installed, launch it and enter the following URL:
- After the build downloads, a pop-up will appear asking if you want to keep or delete the file. Select Keep and then Install when prompted;
- The installation process may take a few minutes, so be patient. Once it’s finished, you’ll be able to access your new Kodi build from the main menu;
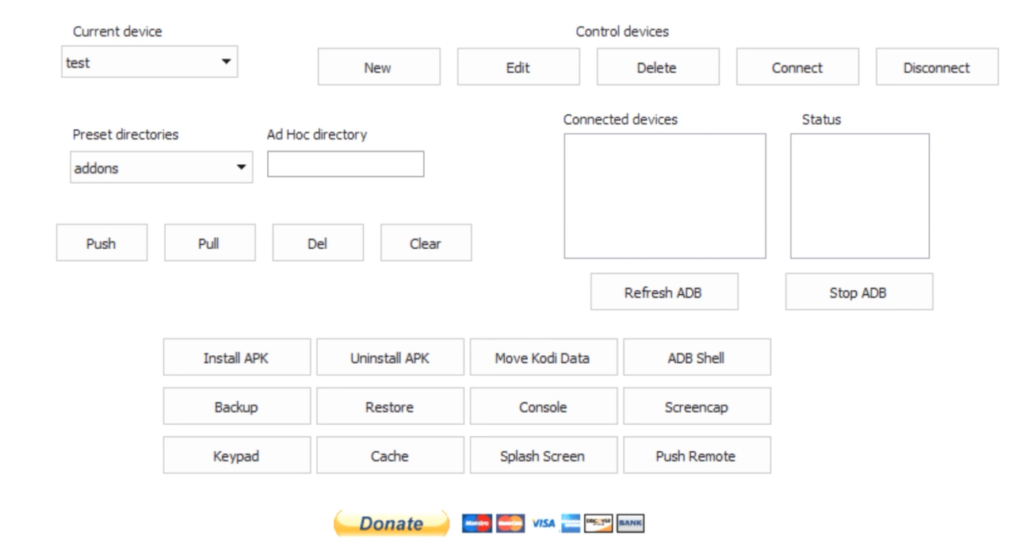
Method 2. Use AdbLink
This is the recommended method if you just want to install a Kodi Build on your Fire TV or Android TV Box. AdbLink is free and easy to use. Once you have AdbLink installed, simply follow these steps:
- Connect your Fire TV or Android TV Box to your PC with a USB cable;
- Open AdbLink and click “New”;
- Select your device from the list and click “OK”;
- Click the “Install APK” button and select the Kodi Build APK file that you downloaded earlier;
- Click “Open” and then “Yes” when prompted;
- The Kodi Build will now be installed on your device;
Method 3. Use DroidAdmin
You can either sideload the app onto your Fire TV Stick or Android TV box or use the DroidAdmin code found in the sidebar of this website. Once DroidAdmin is installed, open it and enter the code sent to you by email.
This will give you access to a variety of different Kodi builds that you can install with just a few clicks. If you want to install more than one build, simply repeat these steps with a different DroidAdmin code.
There are also other ways to install multiple Kodi builds, but these are some of the easiest methods. By using one of these methods, you can easily switch between different Kodi builds to find the one that best suits your needs.
The Easiest Method – Install Builds and Switch Skins
Builds have two parts: add-ons that stay until you manually delete them and skins that let you change the interface. Swapping skins is how you can keep a build’s add-ons while testing different combinations, to find the perfect fit for your needs.
Select and install the builds you want as normal, making sure to choose “standard” when prompted on the wizard. This will prevent any accidental erasing of content from previous builds. Once you have at least two builds installed, follow the instructions above to switch Kodi themes. Doing this allows for changes in look and feel without having to remove or reload any add-ons.

The downside to this method is that you won’t just get the content included in the current build – you’ll see extras from all of the builds you have installed. The appearance will change depending on your skin selection, though, which is usually what people want when they install a new build [5].
How to Install Kodi Fork on Fire Stick?
Installing Kodi on a Fire Stick is pretty simple. Just follow these steps [6]:
- First, you’ll need to enable installation from unknown sources. To do this, go to Settings > System > Developer Options and turn on the “Allow apps from unknown sources” toggle;
- Next, head to the Amazon Appstore and download and install the Downloader app;
- Once that’s done, launch Downloader and enter the URL for the Kodi Fork you want to install. We’ll be using Kodiforuks as our example;
- After the Kodi Fork has been downloaded and installed, you can launch it by going to Your Apps & Channels > Manage Installed Applications;
How to Install a Build on Titanium 18.1 Kodi Fork?
You can install builds onto Titanium just like you would on any other version of Kodi.
Titanium 18.1 Kodi fork comes with the Supreme Builds Wizard addon installed, which has a fair selection of well-known builds.
Installing Kodi builds on Titanium 18.1 is simple when using the Supreme Builds Wizard [7]:
- Open the Supreme Builds Wizard;
- Click on the type of build you want to install (e.g. “Leia Builds”);
- Select the build you want to install from the list and click “Install”;
- The build will now be downloaded and installed onto your Kodi device;
FAQ
How do I update Kodi without a build limit?
To update, start on the Kodi home page and click Add-ons. Then select “My Add-ons”. Double-click on “Kodi No Limits Wizard” and scroll to the bottom of the page. Click Update, follow the directions given on the screen, and you’re all set with the newest version [8]!
How do I change the Kodi build on Amazon Fire Stick?
If you’re using a Fire Stick and want to change the build, the process is a little different. You’ll need to sideload Kodi onto your device since it isn’t available through the Amazon Appstore. Once you have Kodi installed, follow the steps above to select and install a new build.
One of the great things about Kodi is that there are so many customization options available. Whether you want to use a pre-made build or create your own, the sky’s the limit! With a little bit of effort, you can make Kodi look and feel exactly how you want it to. So don’t be afraid to experiment – you might just surprise yourself with what you come up with!
How do I remove old builds from Kodi?
In Kodi, go to System > Add-Ons. On the left side, click Add-Ons. My Add-ons should be selected from the menu that appears. Filter any add-ons you want to get rid of or choose All to remove them all at once. Finally, tap the trashcan icon to remove the add-on [9].
How do I get rid of No Limits build?
If you want to get rid of the No Limits build, you can use the same method as above:
- Go to System > Add-Ons. On the left side, click Add-Ons. My Add-ons should be selected from the menu that appears;
- Filter any add-ons you want to get rid of or choose All to remove them all at once;
- Finally, tap the trashcan icon to remove the add-on. You can also uninstall it by going to Settings > System Settings >Add-ons and selecting Uninstall from the menu;
How do I install Titanium build on Kodi?
To add Titanium to your server, go to your “add-ons” and open “Program add-ons”. Select Supreme Builds from the available options and click “(Supreme Builds) Builds”. From the menu that appears, select Titanium [10].
How do you clean Kodi?
If you’re running multiple builds on your Kodi system, it’s important to know how to clean up your installations properly.
There are a few different ways to clean up your Kodi system, depending on what exactly you want to remove:
- If you’re looking to uninstall an old or unwanted build from your Kodi system, there are a few different methods you can use. The first is to simply delete the build folder from your device. This will remove the build from Kodi, but won’t delete any of your personal settings or data. To do this, open up Kodi and go to the “Add-ons” menu. From here, select “My add-ons” and then find the build you want to uninstall in the list. Once you’ve found it, highlight it and press the “Menu” button on your remote (or right-click with a mouse). From the menu that appears, select “Delete”. Kodi will ask you to confirm that you want to delete the build; select “Yes” to continue. After a few moments, the build will be deleted from your system and you’ll be able to install a new one in its place;
- If you want to completely reset your Kodi system back to its default settings, you’ll need to use a different method. This will delete all of your personal data, so make sure you have everything backed up before proceeding. To reset Kodi, open up the main menu and go to “Settings”. From here, select “System settings” and then scroll down to the “Add-ons” section. Select the “Manage dependencies” option and then find and select “kodi-reset”. Once you’ve selected the reset addon, press the “Install” button to complete the process. After a few moments, your Kodi system will be completely reset back to its default state. You can now begin setting it up again from scratch;
How do you install Xanax build on Kodi?
Xanax is a custom Kodi build that features a wide range of add-ons and repositories. It’s one of the most comprehensive builds available, and it’s constantly updated with the latest add-ons and features.
The reason why Xanax has become so popular is that it offers everything that users are looking for in a Kodi build. It’s easy to install, it’s constantly updated, and it comes with a wide range of add-ons.
Installing Xanax is a pretty simple process, and it can be done in just a few minutes. All you need to do is follow the steps below [11]:
- First, start by downloading the Xanax build from the official website. Once it’s downloaded, open up Kodi and head to the “Add-ons” section;
- From here, click on the “Install from zip file” option and select the Xanax build file that you just downloaded;
- Once the build is installed, restart Kodi and enjoy all of the features and add-ons that it has to offer;
How do I get Kodi on Fire TV?
The easiest way to get Kodi on a Fire TV is to install the Downloader app and use it to download and install Kodi. You can also sideload Kodi using an Android phone or tablet, or by using a Windows PC.
If you’re looking for more than one build, however, things get a bit more complicated. While it is possible to have multiple builds installed on Kodi, it’s not something that we recommend for most users.
There are a few reasons for this:
- First, having multiple builds installed can take up a lot of space on your device;
- Second, each build will need to be updated separately, which can be time-consuming and confusing;
- And finally, if something goes wrong with one of your builds, it can be difficult to troubleshoot and fix;
For most users, most experts recommend sticking with a single build. However, if you’re an experienced Kodi user and you’re comfortable with managing multiple builds, then feel free to give it a try! Just keep in mind that it’s not something recommended for beginners.
How do I clear the log on Kodi?
There is no option to delete temporary cache files, old log files, and unused packages by default. These all data generate problems when using Kodi. The only method to eliminate these temporary cache files and data is to use cleaning software.
How do I get more streams on Kodi?
If you’re looking for more streams on Kodi, one option is to install multiple builds. This can give you access to more content, as well as different ways of organizing and customizing your interface.
However, it’s important to note that not all builds are compatible with each other, so you’ll need to be careful when installing multiple builds. In addition, certain add-ons may only work with specific builds, so you’ll need to keep that in mind as well.
Overall, though, having multiple builds on Kodi can be a great way to get more out of your streaming experience!
How do I add Supreme builds to Kodi?
If you’re looking to add some extra content to Kodi, then you might be wondering if it’s possible to install more than one build. The answer is yes! In fact, you can install as many builds as you want on Kodi.
However, there are a few things to keep in mind before doing so:
- One of the most important things to remember is that each build takes up a certain amount of space on your device. This means that if you have limited storage, you might want to limit the number of builds you install;
- Additionally, each Supreme build comes with its own set of add-ons and repositories. This can cause conflicts if two builds are trying to use the same add-on or repository [12];
Before installing multiple builds, it’s important to do your research and make sure that they are compatible with each other. Once you’ve done that, the process is relatively simple. Just follow the instructions for each build and you’ll be up and running in no time!
Useful Video: How To Install More Then One Build On Kodi
References
- https://www.firesticktricks.com/install-multiple-kodi-builds.html
- https://www.addictivetips.com/media-streaming/kodi/install-multiple-kodi-builds/
- https://www.firesticktricks.com/install-multiple-kodi-builds.html
- https://xtrium.com/can-you-have-more-than-one-build-on-kodi
- https://www.addictivetips.com/media-streaming/kodi/install-multiple-kodi-builds/
- https://troypoint.com/install-multiple-kodi-builds/
- https://www.firesticktricks.com/install-multiple-kodi-builds.html
- https://androidtvnews.com/kodi-no-limits-build
- https://www.alphr.com/software/1004847/how-to-remove-a-kodi-build-reset-kodi-to-its-default-factory-settings
- https://www.vpnmentor.com/blog/how-to-install-titanium-on-kodi
- https://www.addictivetips.com/media-streaming/kodi/install-xanax-build-on-kodi
- https://www.firesticktricks.com/install-supreme-builds-wizard.html